Web console
The web console at app.edgekms.dev manages your hosted edgekms tenants
from a browser: their keys, roles and policies, who else can manage them, and exporting the root
key, plus the SSH keys that can log the CLI in to your account. It's a client of the same control API the edgekms CLI uses, so it can't do anything the
CLI can't, and every rule below (who may sign in, how tenants are named, what a config may
contain) is the server's, enforced the same way for both. The last section
maps each console action to its CLI command.
The console manages tenants. Your programs never talk to it: they use the tenant itself,
https://<tenant>.edgekms.dev, as a Vault Transit server, as the
hosted quickstart describes.
Signing in
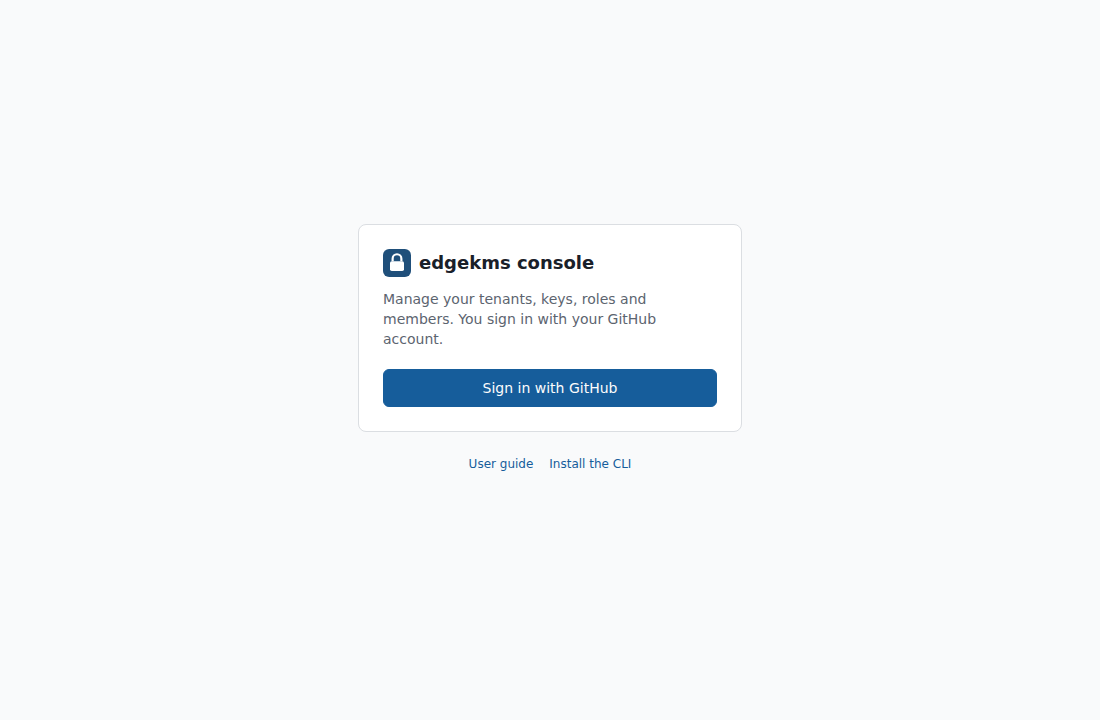
Open app.edgekms.dev and click Sign in with GitHub. The first time, GitHub asks you to authorize the edgekms app; it asks for no permissions beyond who you are. GitHub then sends you back to the console, signed in.
edgekms.dev is invite-only for now. You can sign in if any of these is true:
- an operator has put your GitHub account on the signup allowlist;
- you already belong to a tenant (as an owner, or as a member of an active tenant);
- you have a pending invite to an active tenant;
- you're one of the service's operators.
Your first sign-in as an allowlisted user creates your personal tenant. Signing in on an invite alone gets you into the console to accept it, but no tenant of your own. If none of these is true, the console takes you to Requesting an invite instead.
If the sign-in doesn't work, the sign-in page says why:
| Code in the address | What the page says | What to do |
|---|---|---|
signup_closed | edgekms isn't taking new signups right now. If someone invited you to a tenant, sign in again after they send the invite. | Signups are closed, so there's no invite request to file either. Ask an owner to invite you to their tenant. |
github_denied | GitHub didn't authorize the sign-in. | Sign in again and approve the app when GitHub asks. |
state | That sign-in didn't complete, or it was already used. | Sign in again. A sign-in that takes over ten minutes ends this way. |
rate_limited | Too many sign-in attempts from your network. | Wait a few minutes. |
login_failed | Sign-in failed on our side. | Try again in a moment. |
A session lasts 30 minutes from sign-in, however busy you are. When it runs out, your next click sends you through GitHub again and back to the page you were on. The round trip reloads the page, so save config edits before the 30 minutes are up; unsaved edits don't survive it. Twenty-five minutes after you sign in, a banner at the top says "Your session ends in 5 minutes; save your changes." The console only knows when you signed in on the page load that sign-in returned to, so after you reload the page yourself there's no banner; sign out and in again to restart the clock.
Sign out, top right, ends every edgekms control session you hold, the CLI's included: it's the
same as edgekms account logout, so an EDGEKMS_CONTROL_TOKEN in a terminal stops working too.
It doesn't touch the tenant tokens your programs use (VAULT_TOKEN).
Requesting an invite
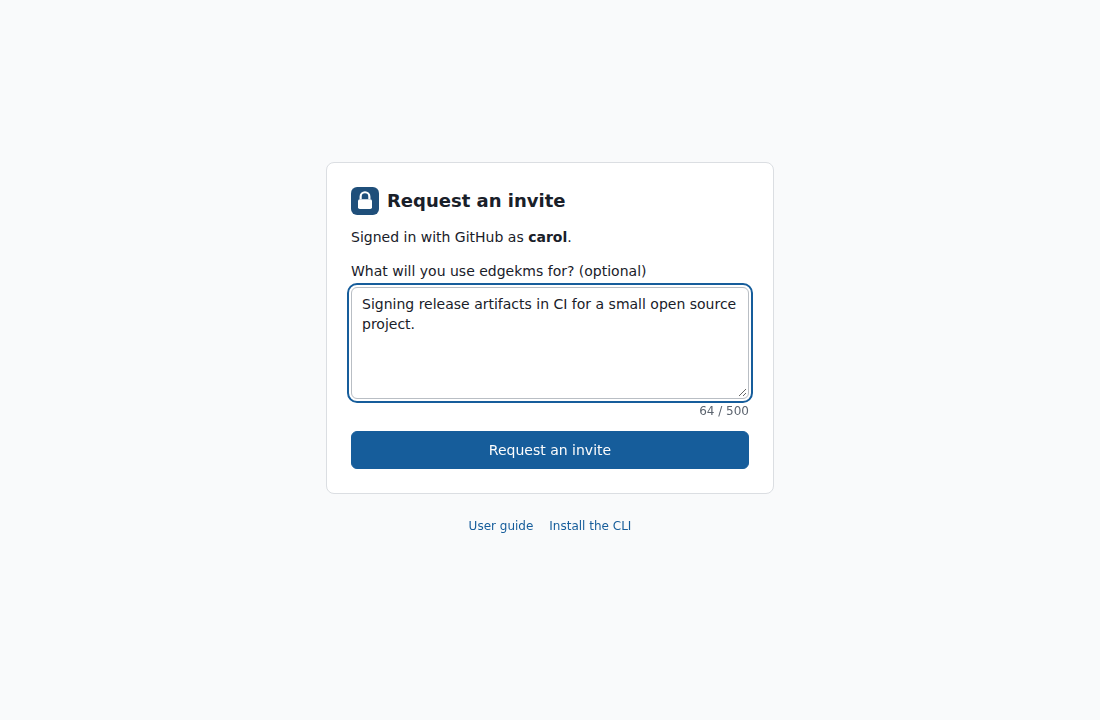
When GitHub sign-in works but edgekms doesn't admit your account yet, the console sends you to app.edgekms.dev/request-invite, signed in as your GitHub account for this one purpose. Say in a sentence what you'll use edgekms for (optional, at most 500 characters, plain text) and click Request an invite. The page shows the date you asked, and an operator reviews the request.
edgekms doesn't email you, and holds no address to email. Sign in again later: once an operator approves you, signing in creates your personal tenant and takes you straight to it, and until then the page shows your request's date and status. A request that wasn't approved says so, and you can't file another one unless an operator deletes it.
You have 15 minutes from the sign-in to send the request. If they run out while you're typing, the page says so; copy your note, then sign in again, since the round trip through GitHub reloads the page. Each GitHub account files one request. If the queue is full, or the service has stopped taking requests, the page says to try again later.
Opened directly, the page offers Sign in with GitHub. If you already have access, that signs you in as usual and takes you to your tenants.
edgekms account request-invite does the same from a terminal, without a browser: it runs GitHub's
device flow, then shows your request's status or files a new one (--note "...", or it asks).
Tenants
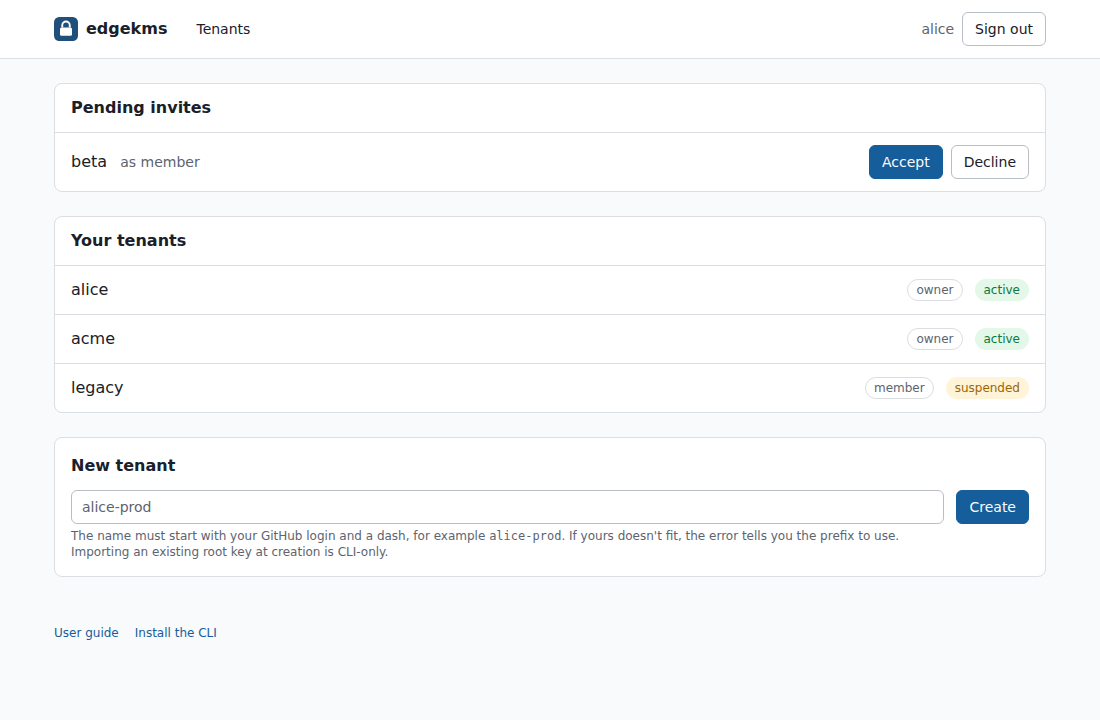
The Tenants page lists every tenant you belong to, with your role in it (owner or member)
and its status. Invites waiting for you sit above it, under Pending invites, with Accept
and Decline buttons.
Your personal tenant is the one your first sign-in created. It's named after your GitHub login in
lowercase, or the login and four random hex digits (alice-3f9a) when that name is taken or not
allowed. It starts with the default config:
- one key,
default; - the
github-usermount, for logging in with a GitHub account; - an
ownerrole that lets your GitHub account log in to the tenant with the policiesadminanddefault-all; - the
adminpolicy (mint and revoke tokens) anddefault-all(every capability ondefault).
To create another tenant, type a name under New tenant and click Create. A new tenant gets a fresh root key and the same default config. The name:
- must start with your GitHub login and a hyphen: if you sign in as
Alice,alice-prodandalice-ciwork andproddoesn't. The login is folded first: lowercased, with anything outsidea-zand0-9turned into a hyphen. If yours doesn't fit, the error names the prefix to use (tenant name must start with alice-); - is 3 to 32 characters of lowercase letters, digits and single hyphens, with no hyphen at either
end, and can't start with
edgekms.
You can create up to five tenants, your personal tenant included. Creating one needs a place on
the allowlist or a tenant you've already created; belonging to someone else's tenant isn't
enough (the error is signups are closed). Creating a tenant from an existing root key is
CLI-only (edgekms tenant create --import-root-id).
Open a tenant to see its tabs. The header shows your role, the status, and the config version, which goes up by one with every save.
A tenant is active or suspended. Only an operator suspends a tenant. While it's suspended,
its host (https://<tenant>.edgekms.dev) refuses every request, its config and members can't
change, and nobody can accept an invite to it. Its owners can still export the root
key, so suspension never locks you out of your own keys.
Owners change everything. Members can read the config and see the members, and nothing more: the config tabs say "Only owners can change the config. You can read it.", and the Export tab isn't there.
Editing a config
The Keys, Roles, Policies and Raw JSON tabs are four views of one config, the same JSON a self-hosted edgekms reads. Your changes collect in the browser until you click Save in the bar at the bottom; Discard throws them away. Switching tabs keeps them.
On save, the server checks the whole config and refuses it with the first problem it finds,
naming the path (for example invalid config: roles.ops: an SSH role needs ssh_keys). The message
shows at the top of the page and your edits stay put. A saved config reaches every edge location
within about 30 seconds.
Each save names the version it replaces. If someone else saved in the meantime, from the console or the CLI, the console says "This config changed elsewhere.", loads the newer version, and shows yours below it. Re-enter your change on the newer version, or click Load my version into the editor and save to overwrite theirs on purpose.
The hosted service adds a few rules to the config: leave root_id alone, leave out
public_origins, keep the github-user mount's client_id as it is, and point no jwks_url at
edgekms.dev. A config holds at most 64 keys, 32 mounts, 128 roles and 128 policies.
Keys
Add key takes a name (1 to 128 of A-Z, a-z, 0-9, _ and -) and gives the key a random
id. Save, then grant it in a policy before anything can use it.
The table's columns:
- Id is where the key's material comes from: each key is derived from the tenant's root key and its id, and nothing else is stored. The name is only a label. Two keys with different ids are different keys, even under the same name.
- Latest version is the version
encryptuses. Raising it rotates the key: new ciphertext uses the new version, and old ciphertext still decrypts. - Min decryption version is the oldest version
decryptaccepts. Raising it retires older versions;rewrapmoves old ciphertext to the latest version first.
Each row has Rotate, which raises the latest version by one. Once a key has more than one version, Raise minimum opens a form for a new minimum decryption version, from one above the current minimum up to the latest version. It warns that ciphertext under any older version stops decrypting, and asks again before it changes the config. Rewrap old ciphertext first. Both changes, like every other, take effect when you click Save.
The forms never remove a key. Removing one leaves everything encrypted under it undecryptable until someone adds it back with the same id, and a click is too easy a way to do that.
Use the Raw JSON tab for what the forms don't do:
- lowering a key's minimum decryption version, which makes its older versions decrypt again;
- removing a key (remove it from every policy too, or the save is refused);
- renaming a key while keeping its id, and so its material;
- pasting in a config from elsewhere, such as a self-hosted instance's.
The Raw JSON editor flags JSON that doesn't parse and won't save it.
Mounts and roles
A mount is one way to log in to the tenant; a role on a mount says who may log in that way and which policies their token gets. The Roles tab lists the mounts first, then each mount's roles.
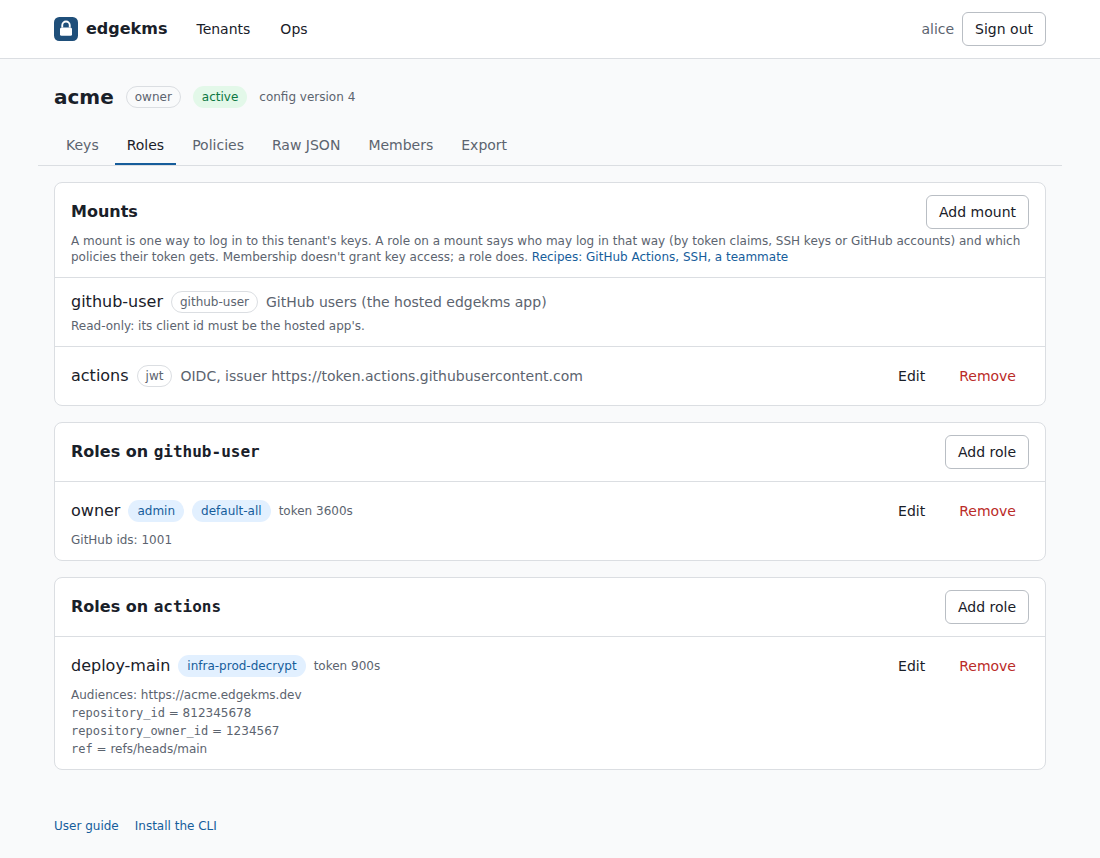
Add mount offers three types:
- SSH keys: callers sign a challenge with an SSH key that a role lists.
- GitHub Actions (OIDC): GitHub's OIDC issuer and its key set, filled in for you.
- Other OIDC: any other OIDC issuer, with its signing keys from a JWKS URL or pasted inline (Google, Cloudflare Access, a Kubernetes cluster).
The github-user mount, which a new tenant starts with, is read-only here: its client id must be
the hosted app's. A mount can't be removed while a role uses it.
Every role has a Role name, a Token lifetime (seconds) from 60 to 34,560,000 (400 days), at least one policy under Policies, and Not before (Unix seconds), which you can leave at 0. A token issued before Not before is refused, so raising it to now cuts off every token already issued for the role. The rest of the form depends on the mount type, as the recipes below show. Removing a role that holds an admin policy asks first, since it may be the only way anyone can mint tokens.
GitHub Actions for a repository or branch
This lets the workflows on main in one repository decrypt with a key infra-prod, and nothing
else. The tenant in the examples is acme.
- On Keys, add
infra-prod. - On Policies, add a policy
infra-prod-decryptand tick decrypt on theinfra-prodrow. - On Roles, click Add mount, name it
actions, leave the type at GitHub Actions (OIDC), and click Add mount. - Under Roles on actions, click Add role. Name it
deploy-main, set the token lifetime to900, and tickinfra-prod-decrypt. - Bound audiences already holds
https://acme.edgekms.dev, your tenant's URL. The workflow asks GitHub for a token with this audience, so a GitHub token minted for some other service isn't accepted here. - Under GitHub repository, enter
acme/appas the repository andmainas the branch, and click Look up repository. The console asks GitHub for the repository's numeric id and its owner's, and shows them: "Found acme/app: repository id 812345678, owner acme id 1234567." Click Bind acme/app. That fills in three bound claims:repository_id, exact, the repository's numeric id;repository_owner_id, exact, the owner's numeric id;ref, exact,refs/heads/main.
- Click Add role, then Save.
The preset binds the numeric ids, not repository and repository_owner: a deleted repository's
or organization's name can be registered again by someone else, and a role bound to the name would
trust them. You can still type repository or repository_owner under Bound claims by hand;
the form marks each one "can be renamed; prefer ids". The lookup sees public repositories only.
For a private one, add the claims by hand, with the ids from
gh api repos/acme/app --jq '{id, owner_id: .owner.id}'. Every bound claim must match, and the
token's aud must be one of the bound audiences. GitHub's claims are documented in
About security hardening with OpenID Connect.
The saved config then has, besides what was there:
{
  "keys": {
    "infra-prod": { "id": "k_3f9a1c7e5b2d4086", "latest_version": 1, "min_decryption_version": 1 }
  },
  "mounts": {
    "actions": {
      "type": "jwt",
      "issuer": "https://token.actions.githubusercontent.com",
      "jwks_url": "https://token.actions.githubusercontent.com/.well-known/jwks"
    }
  },
  "roles": {
    "deploy-main": {
      "mount": "actions",
      "bound_audiences": ["https://acme.edgekms.dev"],
      "bound_claims": {
        "repository_id": "812345678",
        "repository_owner_id": "1234567",
        "ref": "refs/heads/main"
      },
      "policies": ["infra-prod-decrypt"],
      "token_ttl_secs": 900
    }
  },
  "policies": {
    "infra-prod-decrypt": { "keys": { "infra-prod": ["decrypt"] } }
  }
}
For more than one branch, enter a branch with a * in the preset (release/*), or set Match
to glob for ref. In a glob only * is special, and
it matches any run of characters, slashes included: refs/heads/release/* admits every release
branch, and refs/tags/v* every tag starting with v. A glob without a * is refused. To admit
every branch and tag of the repository, leave ref out:
{
  "roles": {
    "release-branches": {
      "mount": "actions",
      "bound_audiences": ["https://acme.edgekms.dev"],
      "bound_claims": {
        "repository_id": "812345678",
        "repository_owner_id": "1234567",
        "ref": { "glob": "refs/heads/release/*" }
      },
      "policies": ["default-all"],
      "token_ttl_secs": 900
    }
  }
}
GitHub's environment claim works the same way, for a role only a deployment environment's jobs
can use; the preset's Environment field adds it.
In the workflow, give the job id-token: write, then swap GitHub's token for an edgekms token at
the mount's login path, /v1/auth/actions/login:
permissions:
  id-token: write
  contents: read

steps:
  - name: Log in to edgekms
    run: |
      jwt=$(curl -fsS -H @<(printf 'Authorization: Bearer %s\n' "$ACTIONS_ID_TOKEN_REQUEST_TOKEN") \
        "$ACTIONS_ID_TOKEN_REQUEST_URL&audience=https://acme.edgekms.dev" | jq -r .value)
      token=$(jq -n --arg jwt "$jwt" '{role: "deploy-main", jwt: $jwt}' |
        curl -fsS -X POST -H 'Content-Type: application/json' -d @- \
          https://acme.edgekms.dev/v1/auth/actions/login | jq -r .auth.client_token)
      echo "::add-mask::$token"
      echo "VAULT_ADDR=https://acme.edgekms.dev" >> "$GITHUB_ENV"
      echo "VAULT_TOKEN=$token" >> "$GITHUB_ENV"
hashicorp/vault-action does the same with method: jwt, path: actions, role: deploy-main
and jwtGithubAudience: https://acme.edgekms.dev.
An SSH key
This lets you log in from a laptop with an SSH key, including one held in ssh-agent or a FIDO security key.
- On Roles, click Add mount, name it
laptops, choose SSH keys, and click Add mount. - Under Roles on laptops, click Add role, name it
ops, and tick the policies it should have. - Paste your public key (the contents of
~/.ssh/id_ed25519.pub) under SSH public keys, one per line. Keys of typessh-ed25519,[email protected]andecdsa-sha2-nistp256work; RSA keys don't. Add one line per key that may use the role. - Click Add role, then Save.
{
  "mounts": {
    "laptops": { "type": "ssh" }
  },
  "roles": {
    "ops": {
      "mount": "laptops",
      "ssh_keys": [
        "ssh-ed25519 AAAAC3NzaC1lZDI1NTE5AAAAIECuMVTSffC9svaph6pZT+piiQhqQ66LWhfOvn+fHW0j you@laptop"
      ],
      "policies": ["default-all"],
      "token_ttl_secs": 3600
    }
  }
}
Log in with the CLI, which has ssh-keygen sign the challenge:
export VAULT_ADDR=https://acme.edgekms.dev
export VAULT_TOKEN="$(edgekms login ssh --addr "$VAULT_ADDR" --mount laptops --role ops --key ~/.ssh/id_ed25519.pub)"
A teammate's GitHub account
Membership in a tenant is about managing it, not using its keys. To let a teammate encrypt or decrypt, give their GitHub account a role.
- On Roles, under Roles on github-user, click Add role. Name it, say
bob, and tick the policies to grant. - Under GitHub users, type their GitHub login and click Look up. The console asks GitHub for the account's numeric id and shows it; click Add bob. Add more accounts the same way.
- Click Add role, then Save.
The role stores numeric ids, not logins, because a login can be renamed and then taken by someone else:
{
  "roles": {
    "bob": {
      "mount": "github-user",
      "github_user_ids": [4242],
      "policies": ["default-all"],
      "token_ttl_secs": 3600
    }
  }
}
Your teammate logs in with GitHub's device flow:
export VAULT_ADDR=https://acme.edgekms.dev
export EDGEKMS_GITHUB_CLIENT_ID="$(curl -fsS https://api.edgekms.dev/v1/info | jq -r .github_client_id)"
export VAULT_TOKEN="$(edgekms login github --addr "$VAULT_ADDR" --role bob)"
Policies
A policy grants capabilities. Each policy on the Policies tab is a grid, one row per key and one column per capability, with the admin capabilities below it. Add policy creates an empty one, which grants nothing until you tick something. A policy can't be removed while a role uses it.
| Capability | What a token with it can do |
|---|---|
encrypt | Encrypt with the key (transit/encrypt/<key>), always with its latest version. |
decrypt | Decrypt the key's ciphertext (transit/decrypt/<key>), down to its min decryption version. |
rewrap | Re-encrypt the key's ciphertext under its latest version (transit/rewrap/<key>), without the plaintext leaving the server. |
read | Read the key's metadata (transit/keys/<key>): its versions, never its material. |
token-create | Mint tokens (auth/token/create) for any key policy the caller holds, with a lifetime up to 400 days. Never an admin policy: a token can't pass on token-create or token-revoke. |
token-revoke | Revoke a token by its accessor (auth/token/revoke-accessor). |
Everything is denied unless a policy grants it, and a token gets the union of its role's
policies. Admin capabilities come only from a role: the default owner role has the admin
policy, and a token its holder mints for OpenBao's auto-unseal, say, can carry default-all but
never admin.
Members and invites
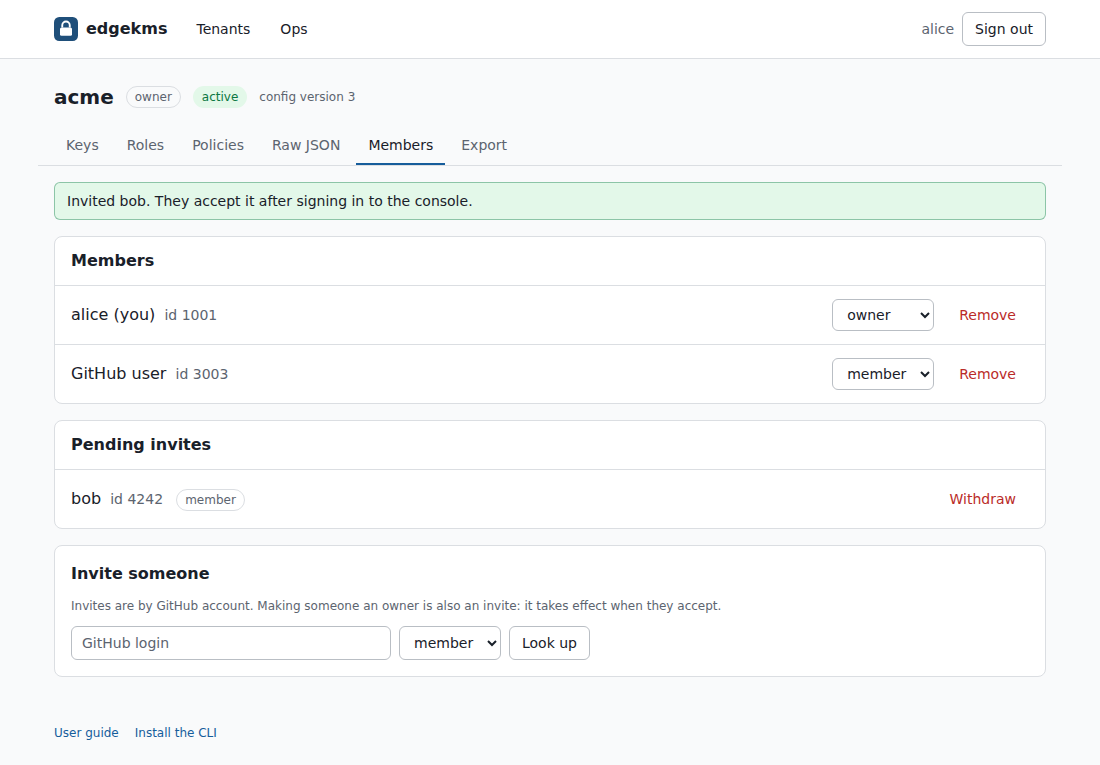
The Members tab lists the tenant's members and pending invites. Owners edit the config, manage members and export the root key; members can read the config and the member list. A tenant always keeps at least one owner. Remember that membership grants nothing on the keys: for that, add a role.
To invite someone, owners use Invite someone: type their GitHub login, choose member or
owner, and click Look up. The console finds the account's numeric id at GitHub and asks
"Invite bob (id 4242) as member?"; click Send invite. They needn't have signed in to edgekms
before.
An invite grants nothing until it's accepted, so no one gets a seat, or the responsibilities of
an owner, without agreeing to it. That includes making an existing member an owner: choosing
owner in their row records an invite, which takes effect when they accept. Lowering an owner to
member applies at once. Withdraw cancels a pending invite; Remove takes a member out.
The last owner can't be removed or lowered.
The invitee signs in at app.edgekms.dev, even while signups are invite-only, and finds the invite under Pending invites on the Tenants page, with Accept and Decline. An invite to a suspended tenant can be declined but not accepted. Accepting never lowers a role someone already has.
The server knows members by numeric GitHub id only. The console asks GitHub for each id's current
login (api.github.com/user/<id>, once per id per page load) and shows it beside the id. When
GitHub doesn't answer, say for a deleted account or GitHub's limit of 60 lookups an hour per
network, the row shows "GitHub user" with the id. The signup allowlist on the Ops page works the
same way.
Export
The root key is the secret every key in the tenant derives from. With the root key, the root id and the tenant's config, anyone can decrypt everything the tenant has ever encrypted, on their own machine, without edgekms, and mint tokens for it. Export it to keep an offline backup, or to move the tenant to a self-hosted edgekms Worker.
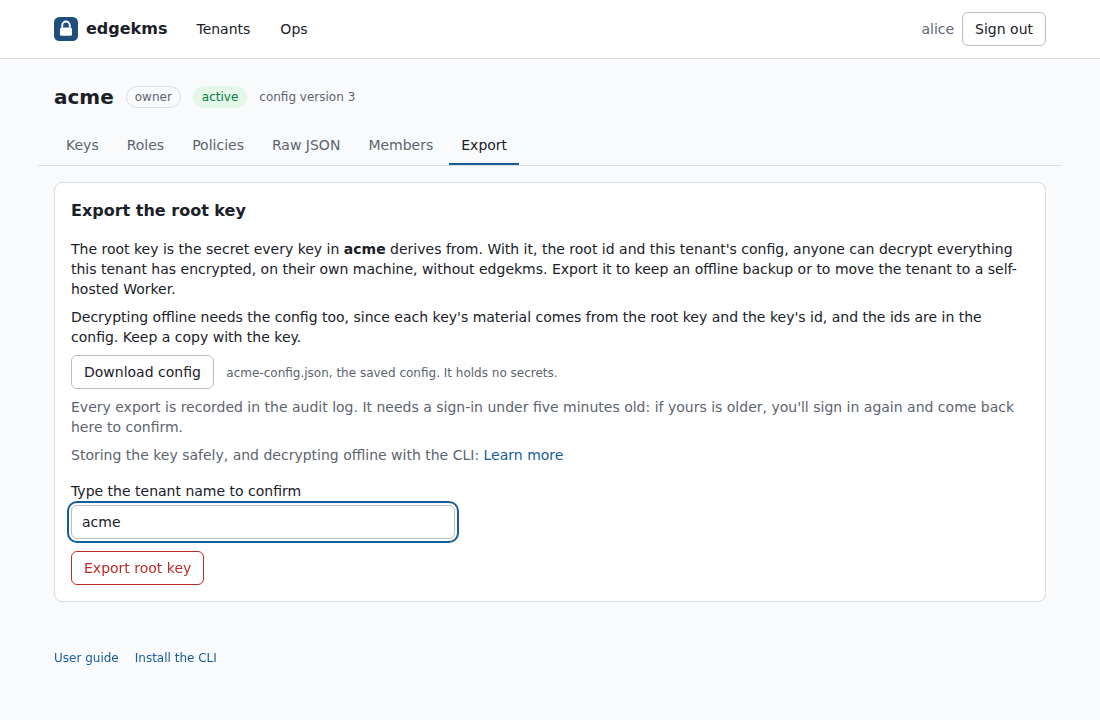
Only owners see the Export tab, and it works on a suspended tenant too.
- Type the tenant's name exactly under Type the tenant name to confirm, and click Export root key.
- Export needs a sign-in under five minutes old. If yours is older, the console sends you through GitHub and back to the Export tab; type the name and click Export root key again.
- The console shows the Root id and the Root key (base64) once. Copy key copies the key; Done, hide it, or leaving the page, clears it. There's no way to show it again without another export.
- Click Download config, beside the key or above the confirmation, to save
acme-config.json. The console writes it from the config the page loaded (the saved one, not unsaved edits), without a request; it has the root id and the key ids, and no root key.
Every export is recorded in the tenant's audit log.
Store the key where only you can read it: a password manager, or a SOPS file encrypted to your own age or PGP key. To make that SOPS file without the key touching disk, paste it at a silent prompt:
read -rs ROOT_KEY    # paste the key, press Enter; nothing echoes
printf '%s' "$ROOT_KEY" | jq -Rn '{root_key: input}' |
  sops encrypt --filename-override root.sops.yaml --input-type json --output-type yaml \
    /dev/stdin > root.sops.yaml
unset ROOT_KEY
The CLI can skip the clipboard entirely: edgekms tenant export acme prints the key alone on
stdout, for a pipe straight into sops, as the
quickstart shows.
Keep the config with it. Each key's material comes from the root key and the key's id, the ids are only in the config, and decrypting offline needs both. Download config saves it, as does the CLI:
edgekms tenant config get acme > acme-config.json
sops decrypt --extract '["root_key"]' root.sops.yaml |
  edgekms decrypt --config acme-config.json --key default vault:v1:...
edgekms decrypt reads the root key from stdin, never from a terminal or a flag, works with no
network, and prints the plaintext. edgekms export --config acme-config.json --key default --version 1 prints one key version's raw bytes, for importing into OpenBao or Vault (BYOK).
The security model has the details.
Account
The Account link in the top bar, beside your login, opens your account page. Its one section,
SSH keys, lists the keys that can log in to the control plane as you with
edgekms account login --ssh. That login is for when GitHub sign-in isn't available, say a lost
GitHub account or a GitHub outage: it gets the CLI a control token, enough to export a tenant's
root key. The console itself always signs in with GitHub.
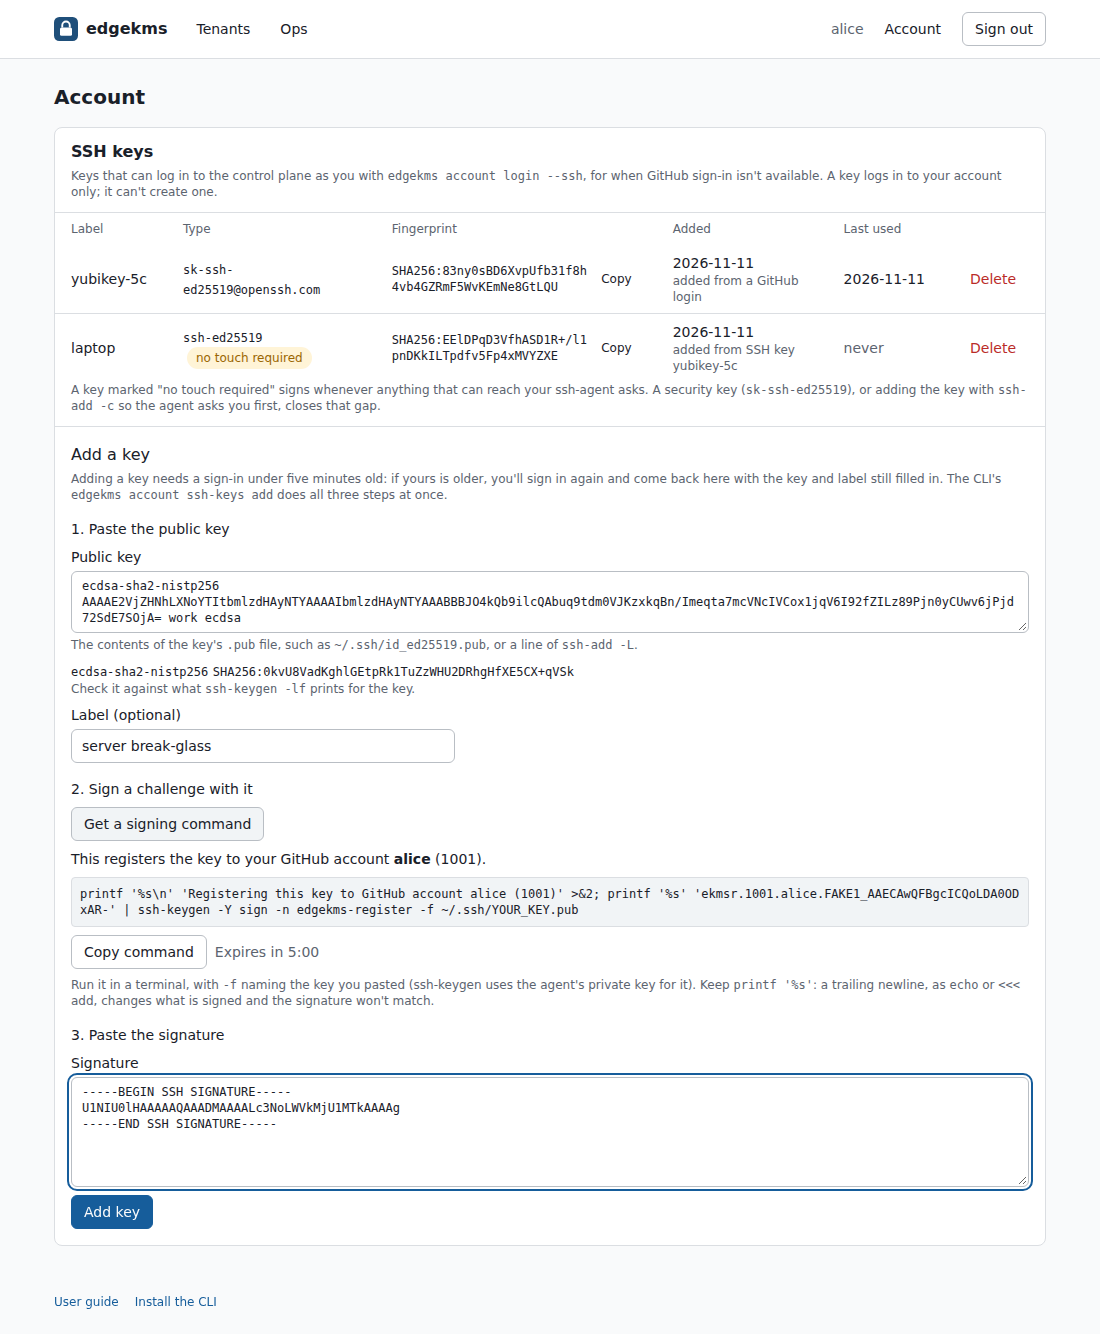
Each key shows its label, its type, its fingerprint (with Copy), the date you added it and
from what, and the last time it logged in. "added from a GitHub login" means you added it while
signed in with GitHub; "added from SSH key laptop" means you added it from a session the key
labelled laptop logged in.
A key marked no touch required signs whenever anything that can reach your ssh-agent asks, so
whoever gets at that agent, a forwarded one included, can log in as you. A security key
([email protected], made with ssh-keygen -t ed25519-sk) needs a touch for every
signature; for any other key, ssh-add -c makes the agent ask you before each use.
An account holds up to 10 keys, of three types: ssh-ed25519, [email protected] and
ecdsa-sha2-nistp256. RSA keys can't log in.
A fingerprint in the warning box under the table belongs to a record that failed its integrity check: the control plane didn't write it, or it changed since. It can't log in. Delete removes it.
Adding a key
Adding a key needs a sign-in under five minutes old, and proof that you hold the key.
-
Paste the public key under Public key: the contents of its
.pubfile, or a line ofssh-add -L. The page shows the key's type and fingerprint, computed in your browser; check it against whatssh-keygen -lf ~/.ssh/YOUR_KEY.pubprints. Label starts as the key's comment; change it to anything up to 64 characters, or clear it. -
Click Get a signing command. If your sign-in is older than five minutes, the console sends you through GitHub and back to this page with the key and label filled in again; click it once more. The page names the GitHub account the key will be registered to, which is yours, and shows a command, good for five minutes:
printf '%s\n' 'Registering this key to GitHub account alice (1001)' >&2; printf '%s' 'ekmsr.1001.alice.AAAA...' | ssh-keygen -Y sign -n edgekms-register -f ~/.ssh/YOUR_KEY.pubClick Copy command, put the key you pasted in place of
YOUR_KEY, and run it. It first prints the account the key goes to, thenssh-keygensigns with the private key from your agent, or from the file beside the.pub. Keepprintf '%s':echoand<<<add a trailing newline, which changes what's signed, and the signature won't match. -
Paste the whole
-----BEGIN SSH SIGNATURE-----block it prints under Signature, and click Add key. The confirmation names the account the key was added to.
The challenge you sign starts with the account it registers the key to (ekmsr.1001.alice.), and
the control plane registers the key to that account only. Only sign one that names your own
account. If a page, a message or a person asks you to run a command whose challenge or first line
names any other account, don't: the key would be registered to theirs, and an SSH login with it
would land you in their account. The console itself refuses to show a command for a challenge that
names anyone but you.
The console keeps nothing but the public key and the label in your browser, and only for the trip
through GitHub. The signature uses the namespace edgekms-register, which a login never accepts,
so a signature made on this page can't log anyone in. The CLI does all three steps at once:
edgekms account ssh-keys add --key ~/.ssh/YOUR_KEY.pub.
If the control plane refuses the key, the page says why:
| What the page says | What to do |
|---|---|
| The signature didn't match this key and challenge | Get a new signing command, check that -f names the key you pasted, and sign again. |
| That key is already registered to an edgekms account | A key belongs to one account. If it's on this one, it's in the table already. |
| Your account has 10 SSH keys | Remove one first. |
| The label must be at most 64 characters... | Shorten the label, or remove the control, bidirectional or invisible character in it. |
| That isn't an OpenSSH public key line | Paste the .pub file's one line, not the private key. |
| edgekms takes ssh-ed25519, [email protected] and ecdsa-sha2-nistp256 keys | Make a key of one of those types: ssh-keygen -t ed25519-sk for a security key, ssh-keygen -t ed25519 otherwise. |
Removing a key
Delete asks you to confirm, naming the key's label and fingerprint. Removing a key needs no fresh sign-in. It ends every CLI session that key logged in, at that session's next request; your other sessions, the console's included, carry on.
If you added other keys from a session this key logged in, the confirmation lists them under Also remove keys this key added, each checked. Uncheck any you want to keep; Remove deletes the key and every key left checked.
Operators
The service's operators (the GitHub ids in OPERATOR_GITHUB_IDS) get an Ops link in the top
bar.
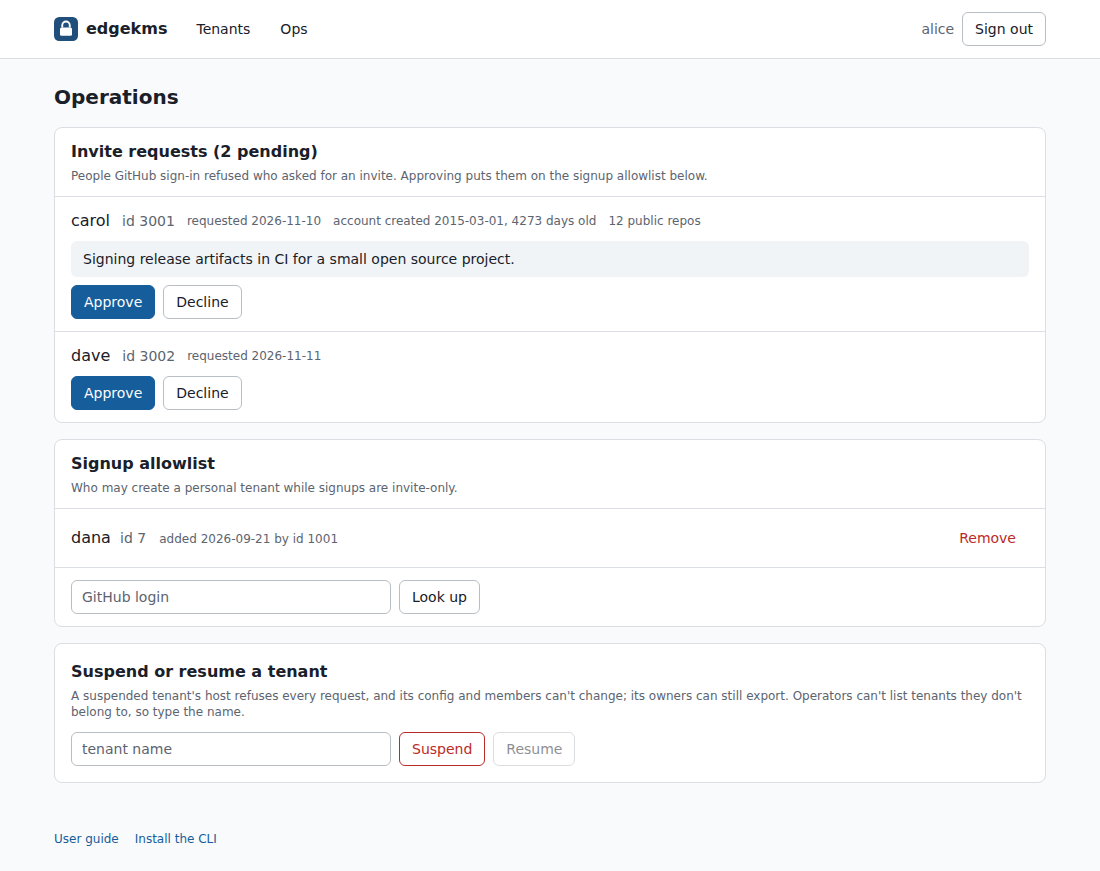
Invite requests lists the requests waiting for you, oldest first, and the header counts them. Each shows the login the person had when they asked, their GitHub id, the date, their note, and, looked up on GitHub from your browser, their current login if it changed, how old the account is and how many public repositories it has (for the first 30 requests; GitHub limits unauthenticated lookups). Approve puts them on the signup allowlist, so their next sign-in creates their personal tenant; Decline marks the request declined, which also stops them asking again. Both ask you to confirm. Show decided lists the 100 most recent decisions, each with Delete: deleting a declined request lets that person ask again, and deleting an approved one leaves them on the allowlist (remove them there). A request the page says doesn't verify was written without the control plane; it can't be approved, only deleted.
Signup allowlist lists who may sign up while signups are invite-only. Type a GitHub login, click Look up, then Allow; Remove takes someone off. Someone removed after their first sign-in keeps signing in as long as they belong to a tenant. A row the list says doesn't verify admits nobody; it's a row the control plane didn't write.
Suspend or resume a tenant takes a tenant name, typed, since operators can't list tenants they don't belong to. Suspend makes the tenant's host refuse every request within about 30 seconds, and freezes its config and members; its owners can still export. Resume undoes it.
Operators can name a new tenant anything valid, without the login prefix, and have no cap on how many they create.
Console and CLI
Every console action has a CLI command. The edgekms tenant and edgekms ops commands read the control token from EDGEKMS_CONTROL_TOKEN.
| In the console | With the CLI |
|---|---|
| Sign in with GitHub | export EDGEKMS_CONTROL_TOKEN="$(edgekms account login)" |
| Sign out | edgekms account logout |
| Request an invite | edgekms account request-invite (--note "<text>") |
| Tenants page: your tenants | edgekms tenant list |
| Tenants page: pending invites | edgekms tenant invites |
| Accept, Decline | edgekms tenant accept <name>, edgekms tenant decline <name> |
| New tenant | edgekms tenant create <name> (also --config <file> and --import-root-id <id>) |
| Open a tenant | edgekms tenant show <name> (details, config, members and invites as JSON) |
| Keys, Roles, Policies, Raw JSON, then Save | edgekms tenant config get <name> > config.json, edit it, edgekms tenant config set <name> config.json (--if-version <n> to refuse if someone saved since) |
| Invite someone as a member | edgekms tenant member add <name> --github-id <id> |
Invite someone as an owner, or choose owner for a member | edgekms tenant member add <name> --github-id <id> --owner |
Choose member for an owner | edgekms tenant member add <name> --github-id <id> |
| Remove, Withdraw | edgekms tenant member remove <name> --github-id <id> |
| Export root key | edgekms tenant export <name> (log in again first if your login is over five minutes old) |
| Export: Download config | edgekms tenant config get <name> > <name>-config.json |
| Account: the SSH keys | edgekms account ssh-keys list |
| Account: Add key | edgekms account ssh-keys add --key <file.pub> (--label "<text>"; log in again first if your login is over five minutes old) |
| Account: Delete | edgekms account ssh-keys remove <id or fingerprint> |
| Ops: Allow, Remove | edgekms ops allowlist add <github_id>, edgekms ops allowlist remove <github_id> |
| Ops: the allowlist | edgekms ops allowlist list |
| Ops: Suspend, Resume | edgekms ops tenant suspend <name>, edgekms ops tenant resume <name> |
| Ops: Invite requests | edgekms ops invite-requests list |
| Ops: Approve, Decline, Delete | edgekms ops invite-requests approve <github_id>, decline <github_id>, delete <github_id> |
The CLI takes numeric GitHub ids where the console takes logins;
curl -fsS https://api.github.com/users/<login> | jq .id finds one.
Install the CLI
The edgekms CLI is a single binary for Linux (x86_64 and arm64) and macOS on Apple silicon.
Installing it takes a download and a checksum check, or one mise use.